Specify custom group mappings in admin UI

frontend
25.08.02-rc1
enhancement
Published

August 11, 2025

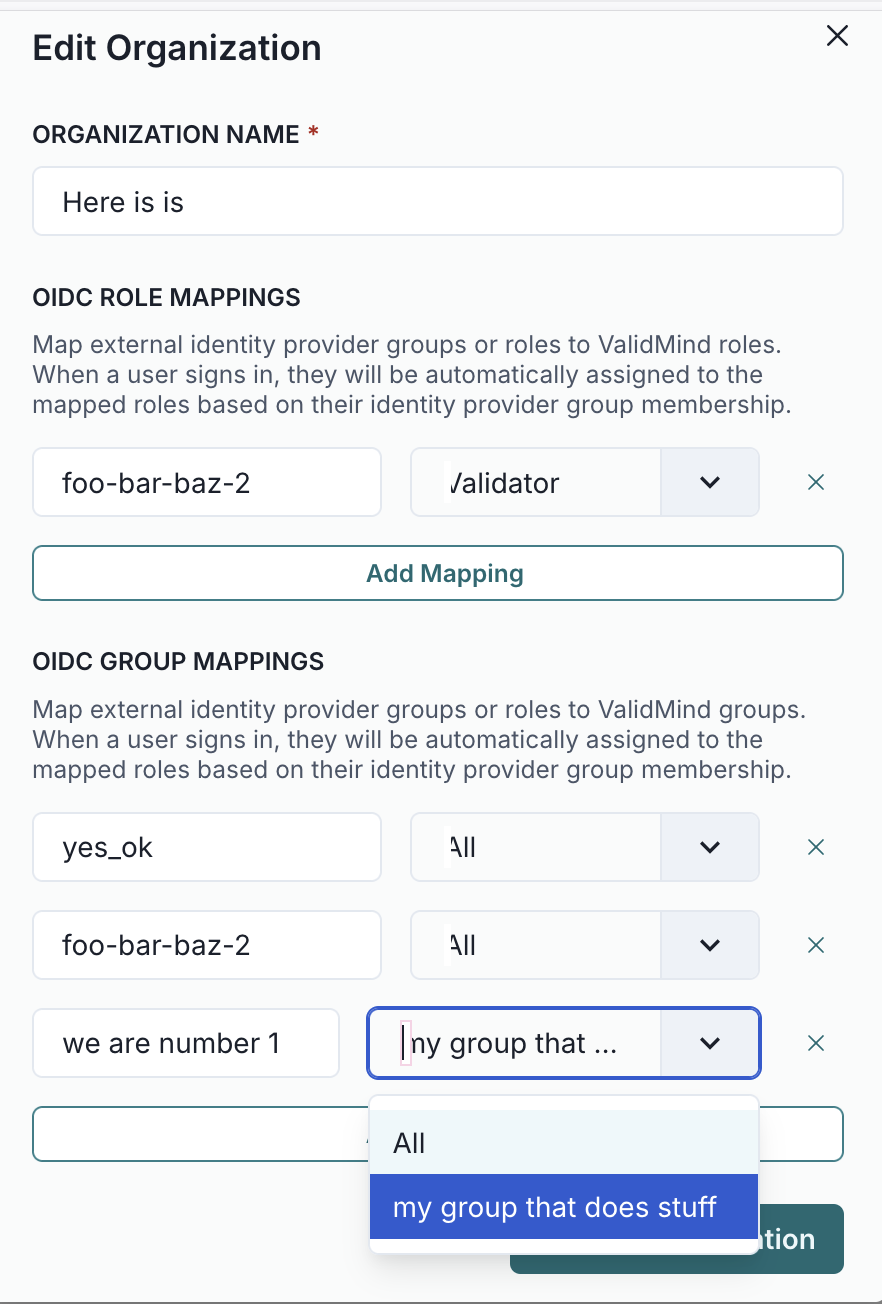
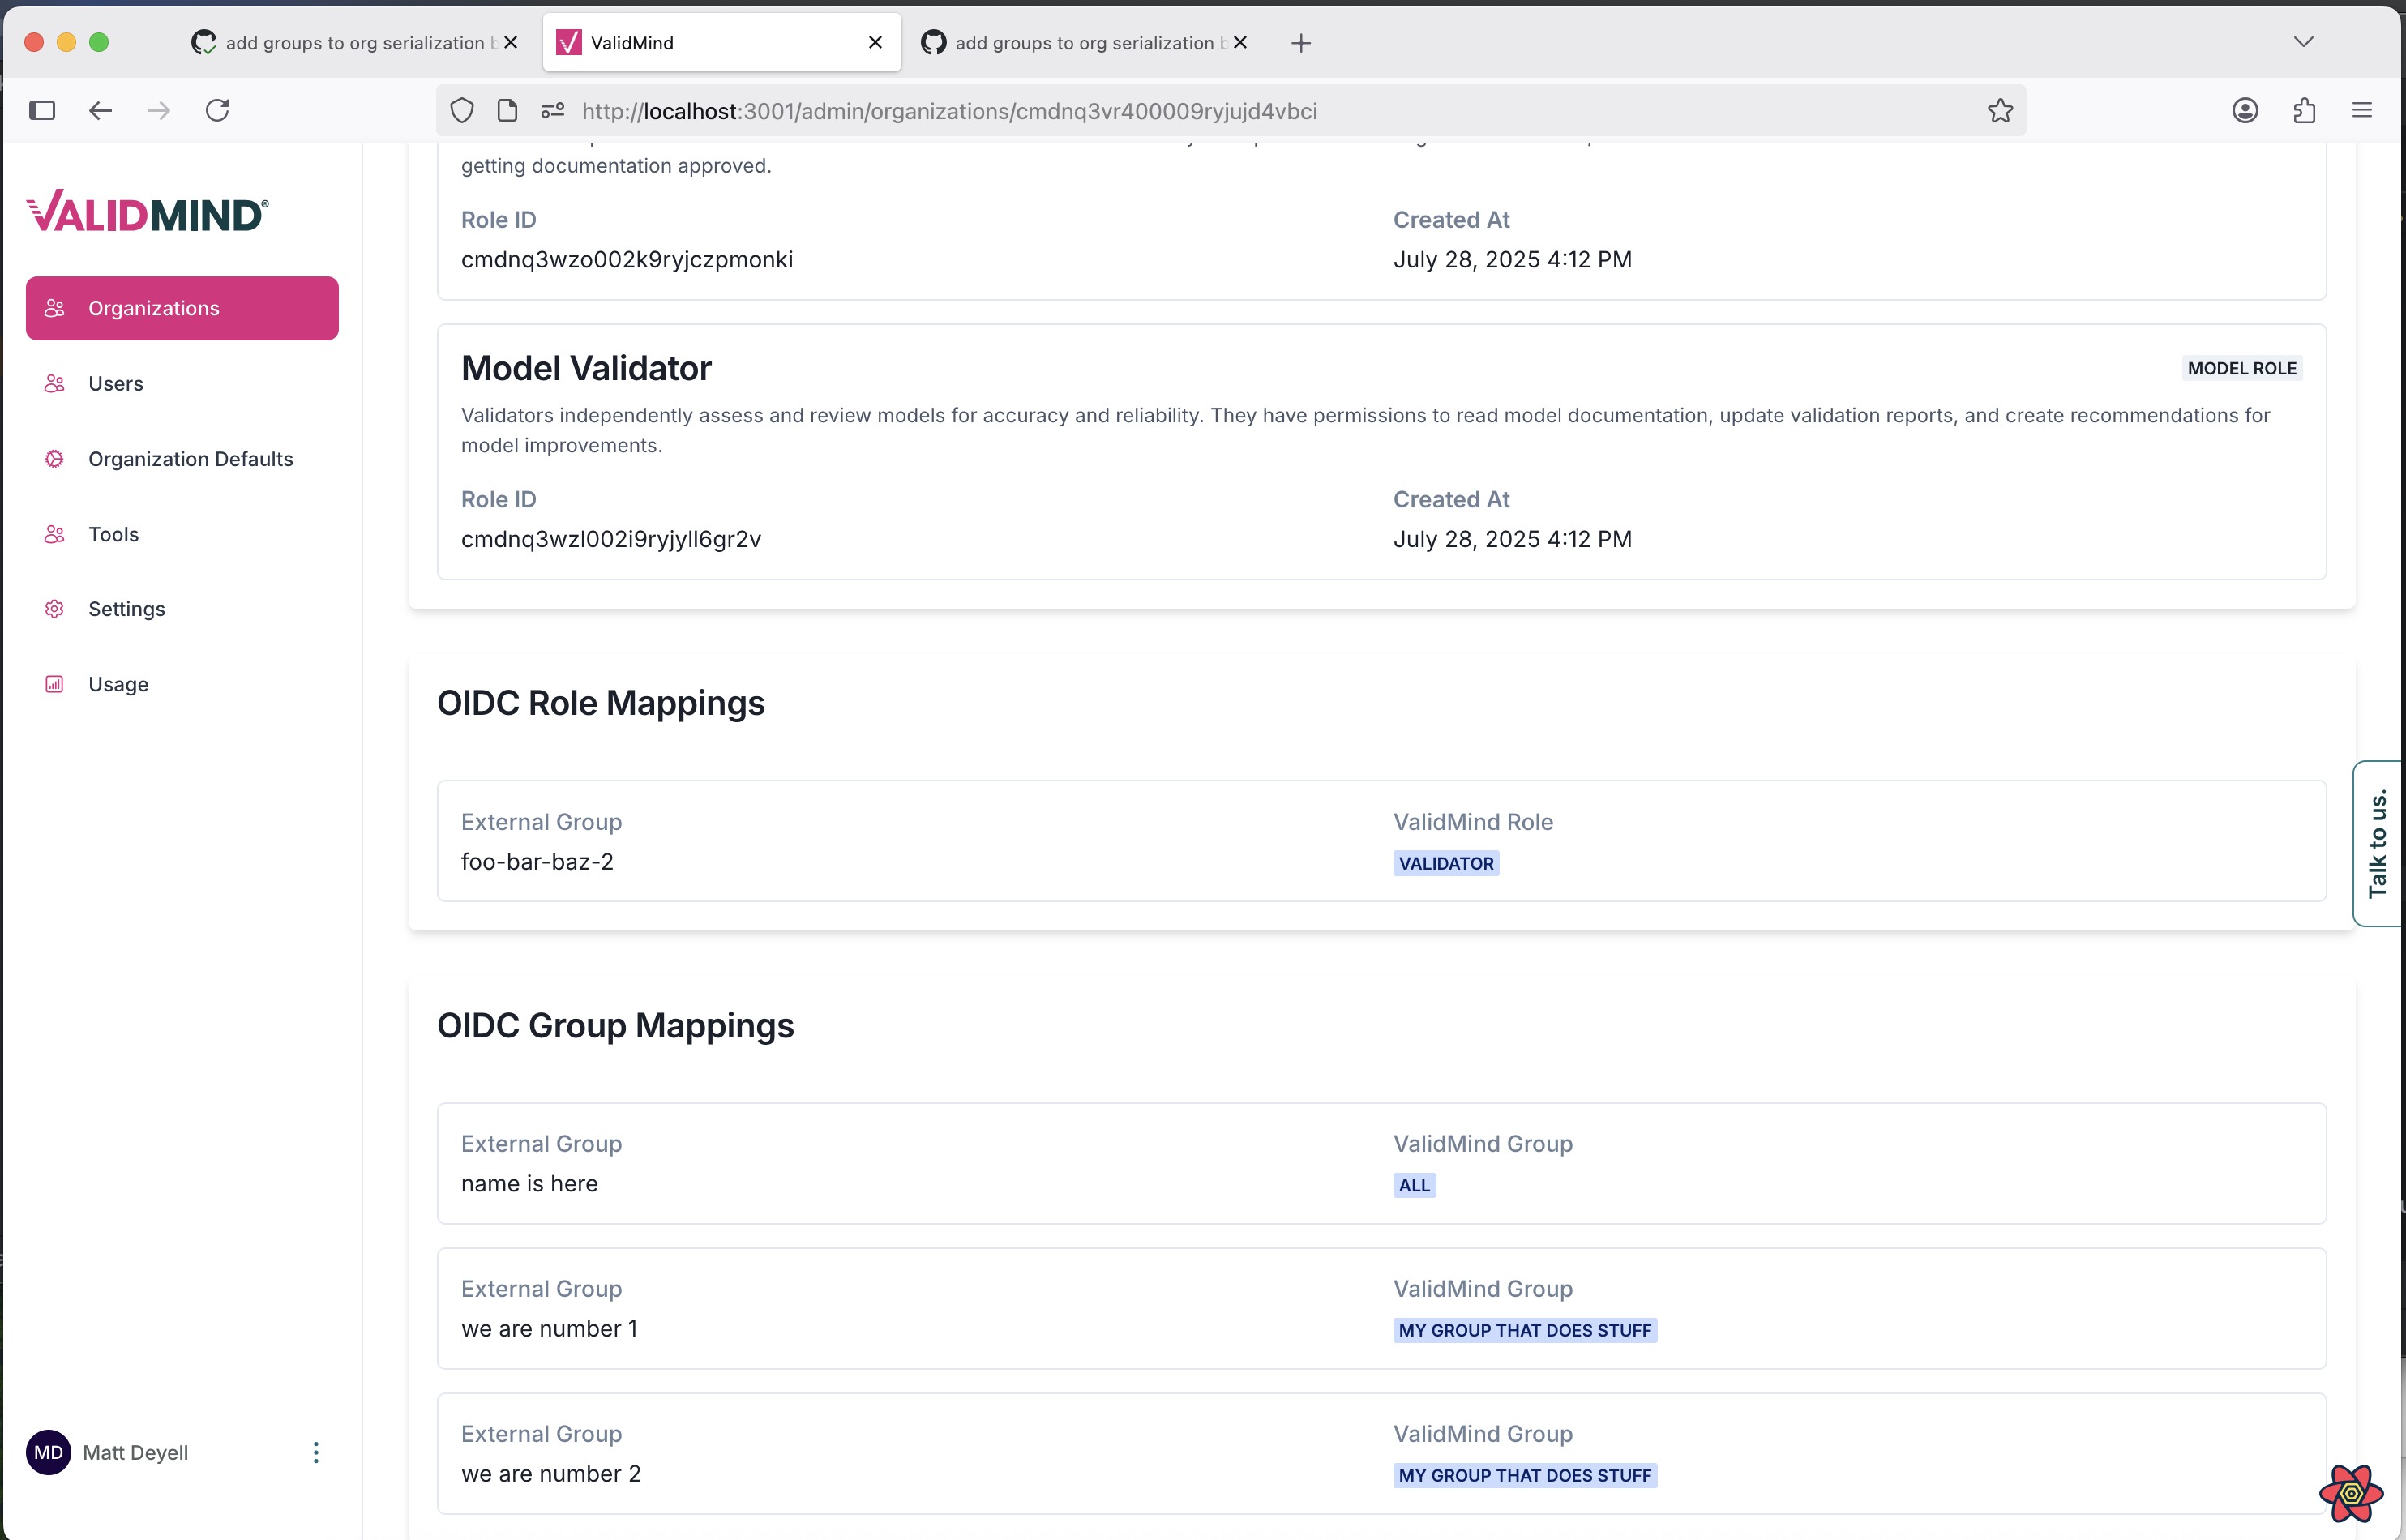
Once Sync OIDC Groups has been toggled on in the ValidMind Admin UI, assign custom group mappings of IDP groups to ValidMind groups:

  1. On the organizations tab, select the organization for which you want to assign group mappings.
  2. Click Edit Organization.
  3. Under oidc role mappings, enter the ID from your token on the left and specify the corresponding group on the right.
  4. Once you’re finished mapping, click Update Organization.

A form interface titled Edit Organization with fields and dropdown menus for configuring OIDC role and group mappings. At the top, there is a text field labeled Organization Name with a red asterisk, indicating it is required. Below, the OIDC Role Mappings section includes a text field with the value foo-bar-baz-2 and a dropdown menu set to /alidator, with an Add Mapping button beneath. The OIDC Group Mappings section contains three rows, each with a text field and a dropdown menu; the first row shows yes_ok and All, the second row shows foo-bar-baz-2 and All, and the third row shows we are number 1 with an open dropdown displaying options including my group that does stuff. At the bottom right, there is a blue Save button.

A web interface titled Model Validator displays details about a model with a unique ID and creation date, showing Role ID and Client ID values. Below, sections for OIDC Role Mappings and OIDC Group Mappings list entries with fields for External Group, Validated Role, and Validated Group, each containing specific data values. The interface features a sidebar on the left with menu items including Users, Organization Defaults, and Settings, highlighted in pink. A vertical tab labeled Table on the right edge provides additional navigation. The overall layout is clean with a white background and sections separated by thin gray lines for clarity.