Configure Azure Private Link
To keep your network traffic private and minimize its attack surface, configure Azure Private Link1 to establish a private connection between ValidMind and your company network.
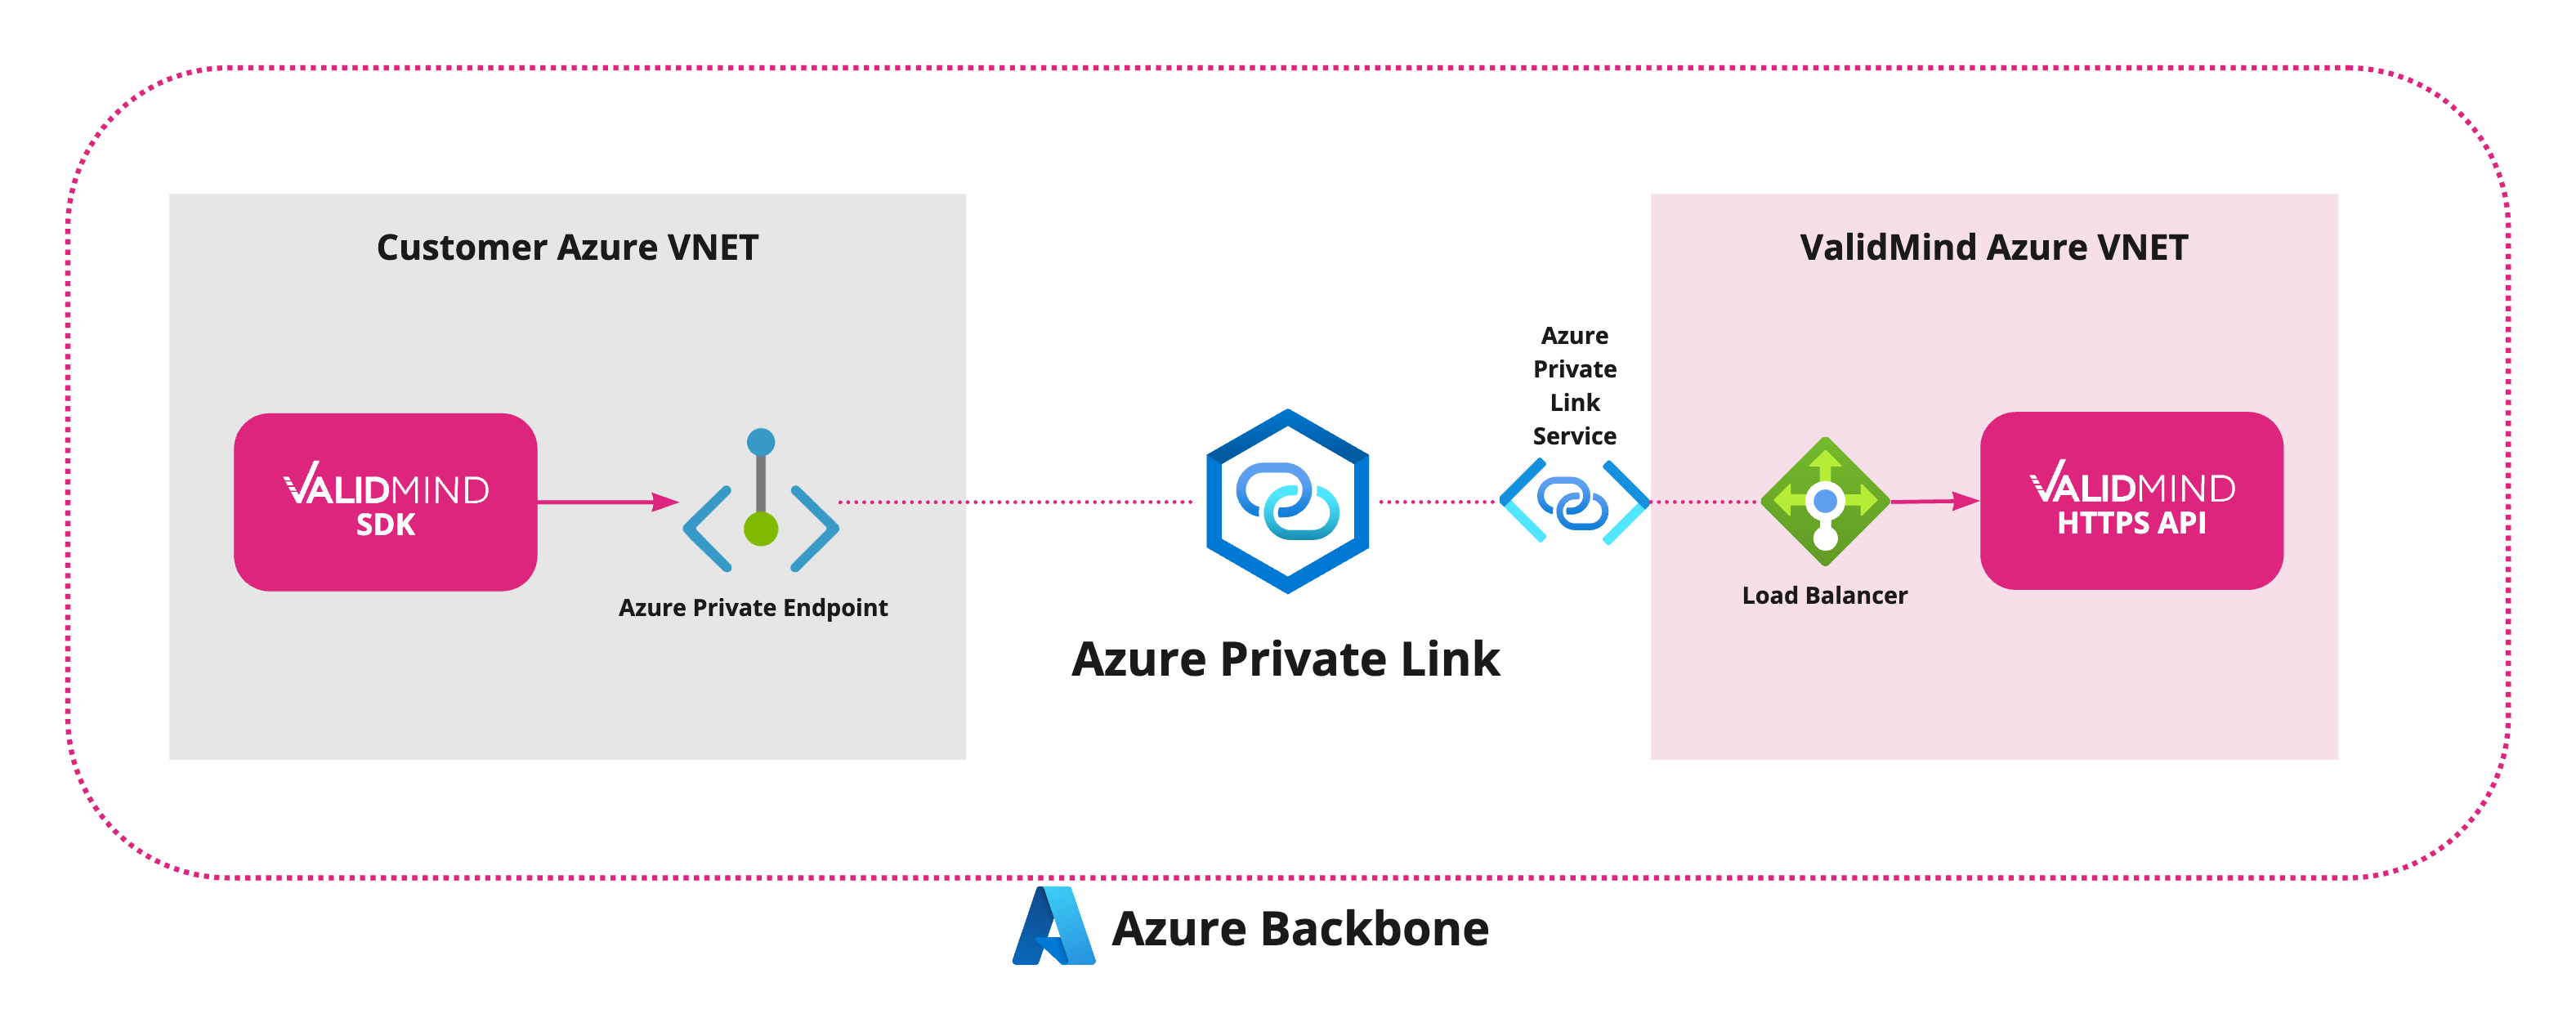
Azure Private Link is a networking service that allows secure and private communication between Azure Virtual Network (VNet) resources and services hosted in other VNets or in Azure partner services, such as ValidMind. With Azure Private Link, you can connect to services over the Azure network without exposing your network traffic to the public internet.
Private Link works by creating a private endpoint for a supported Azure service within your virtual private cloud. This endpoint acts as a proxy between your VNet and ValidMind, allowing traffic to be routed privately over the Azure network. To make the endpoint easier to use, ValidMind provides a private DNS name that developers and validators can connect to in a browser.
To learn more, check Access an Azure service using an interface private endpoint.
Prerequisites
You must have access to the Azure portal for your company and the necessary expertise to set up, configure, and maintain Azure services.
These steps assume that you already have established connectivity between your own company network and an Azure virtual network (VNet) and know which company VNet you want to connect to.
VNet service information
| Region | Service name | Private DNS name |
|---|---|---|
us-west-2 |
Email support@validmind.com | Email support@validmind.com |
Steps
Create an Azure Private Endpoint:
- Log in to the Azure portal.
- Search for Private Endpoints under the services section.
- Click Create:
- Select the subscription and resource group.
- Provide a name for the endpoint.
- Select the subscription and resource group.
- In the Resource tab, select:
- The resource type
- The specific resource
- The sub-resource
- The resource type
- For networking, select:
- The virtual network (VNet)
- The subnet for the private endpoint
- The virtual network (VNet)
- Recommended: When prompted, integrate with an Azure Private DNS zone to simplify private IP name resolution.
- Review the configuration and then click Create to deploy the private endpoint.
- Log in to the Azure portal.
Contact ValidMind at support@validmind.com to get your new private endpoint connection request accepted. Include the following information:
- The owner or account ID
- The private endpoint IP address
- The owner or account ID
After ValidMind has accepted your endpoint connection request, verify the endpoint is available:
- In the Azure portal, go to the Private Endpoints section.
- Verify that the connection status is
Approved. This indicates that the endpoint is properly connected to the target service.
- In the Azure portal, go to the Private Endpoints section.
Enable the private DNS name:
- Check the private endpoint you created, click the Actions menu, and select Modify private DNS name.
- Select Enable for this endpoint.
- Click Save changes.
- Verify that Private DNS names shows the name shown in the VNet service information.
- Check the private endpoint you created, click the Actions menu, and select Modify private DNS name.
Test the connection:
- From your company network, access ValidMind using the private DNS name from the VNet service information.
- In a browser, confirm that you can successfully connect to ValidMind and log in.
- From your developer environment, confirm that you can connect to ValidMind with the library.
- From your company network, access ValidMind using the private DNS name from the VNet service information.
What’s next
After completing these steps, users on your company network can connect to ValidMind via Azure Private Link using the private DNS name from the VNet service information.