Manage artifact fields
Manage the fields that appear on all artifact types logged on your records. Choose from an array of field types with different properties and use cases.
Prerequisites
Artifact field types
- Attachments
- Upload supporting files for your artifact.2 Files must be less than 50 MB each in size.
- Calculation
-
Define a
formula(params)function that reads field values from theparamsdictionary and returns a read-only value. Formulas are written in Starlark3, a small, sandboxed scripting language with a Python-style syntax and a set of built-in helper functions for working with dates, numbers, and lists.
3 Starlark
- Select from the drop-down of Available Artifact Fields and Record Fields Available Via
params["model"]** to allow your formula access to the field’s values.4 - Replace the demonstration formula with your own in the code box provided.5
- Click Test Calculation to open the testing area.
- Enter in sample values in the testing area then click Test Calculation to validate your formula.
4 Fields are grouped by field type.
5 Reference fields with dictionary-style access — params["fieldKey"] and params["model"]["fieldKey"] for parent inventory record data — and use the available helpers for date and number work.
In addition to custom field keys you add from the available fields drop-down, formulas can read built-in keys on the params dictionary:
| Param | Applies to | Availability | Description |
|---|---|---|---|
params["<fieldKey>"] |
Inventory records & artifacts | Add the field from the available fields drop-down | Current value of another custom field on the same record or artifact. |
params["integrations"] |
Inventory records & artifacts | Reference params["integrations"] in the formula source |
Linked external integration data keyed by service (for example, params["integrations"]["mlflow"]). Empty when integrations are not configured or not referenced. |
params["finding_type"] |
Artifacts | Always available on artifact formulas | Artifact type metadata with ["tag"] (technical identifier) and ["name"] (display name). |
params["model"] |
Artifacts | Always available when the artifact is linked to an inventory record | Parent inventory record custom field values (for example, params["model"]["criticality_level"]). |
Reference these helpers in your formulas — they cover the date, number, and list operations the engine does not expose directly:
| Helper | Returns | Description |
|---|---|---|
today() |
"YYYY-MM-DD" |
Current date as an ISO string. |
safe_parse_date(value, default=None) |
"YYYY-MM-DD" or default |
Parses ISO dates/datetimes or millisecond/second epoch timestamps. |
to_iso(value) |
"YYYY-MM-DD" or None |
Alias for safe_parse_date with no default. |
add_days(date, n) |
"YYYY-MM-DD" or None |
Adds n days to an ISO date. |
add_months(date, n) |
"YYYY-MM-DD" or None |
Adds n months to an ISO date. |
days_between(a, b) |
int or None |
Days between two ISO dates (a − b). |
days_since(date) |
int or None |
Days from date to today. |
months_between(a, b) |
int or None |
Full-month difference between two ISO dates. |
get_year(date) / get_month(date) / get_day(date) |
int or None |
Components of an ISO date. |
safe_int(value, default=0) |
int |
Tolerates strings and missing values. |
safe_float(value, default=0.0) |
float |
Tolerates strings and missing values. |
list_count(list, value) |
int |
Number of times value appears in list. |
zfill(value, width) |
string |
Zero-pads value to width characters. |
- Checkbox
-
A
true/falsevalue set by a toggle. - Date
-
- Date value in
yyyy-mm-ddformat.
- Date value in
- Selection is in the current user’s timezone; other users viewing this field will see the value automatically in their timezone.
- Set the Date Format for date fields under your profile.6
- Date Time
-
- Date value in
yyyy-mm-dd, 24hrformat.
- Date value in
- Selection is in the current user’s timezone; other users viewing this field will see the value automatically in their timezone.
- Set the Date Format for date time fields under your profile.7
-
Text value in valid email (
user@domain.com) format. - Long Text
- Toggle Enable rich text formatting to create a template using the rich text editor.
- Multiple Select
- Click Add Option to define a list of options.
- Number
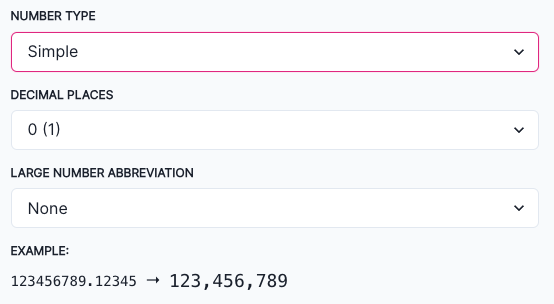
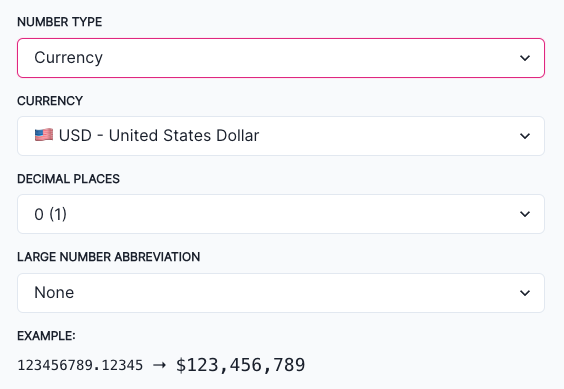
- Text value in valid number format. Number display (comma, fullstop, etc.) is determined by your browser’s locale. Select a Number Type:
- Simple — Define the Decimal Places that the number should be displayed up to and any Large Number Abbreviations.
- Currency — Define the Currency you would like the field to display in, as well as the Decimal Places that the number should be displayed up to and any Large Number Abbreviations.
- Single Line Text
- Simple text value.
- Single Select
- Click Add Option to define a list of options.
- URL
- Text value in valid URL format.
- User
- Select list pre-populated with users from your User Directory.8
- Toggle Allow Linking to Multiple Records on to allow multi-selection of users.
View, search, and filter artifacts fields
In the left sidebar, click Settings.
Under Artifacts, select Artifact Fields.
Displayed in groups9 as lists are the artifacts fields available to artifacts in your organization with a quick view of:10
Narrow down existing artifacts fields available to your artifacts by searching or filtering for results:
11 This count only applies to custom fields.
Click Search to search by keywords within an artifacts field.
Select whether to search in the Title or Description.
Click Search to narrow down your results by your entered keywords.
Expand any inventory field group to see more fields.
Click Filter to filter fields by any of the following criteria:
- Artifact Types — The types of artifacts that use this field.
- Required On Creation — Whether or not the field was set up as required on artifact creation.
- Types — What type of field it is.
- Workflow Triggered By Field — What workflows are initiated when this field is edited.13
- Write Permissions — Which inventory record stakeholder types have permissions to edit this field.14
Click Apply Filters to narrow down your results by your configured criteria.
Expand any inventory field group to see more fields.
Add or edit artifact fields
In the left sidebar, click Settings.
Under Artifacts, select Artifact Fields.
Here you can edit existing artifact fields, or add a new one:
To add a new artifact field, click Add Field:
Artifact fields require you to enter a Title (name), select a field Type,15 and indicate what Artifact Types16 the field is available on.
Include optional information for your artifact field:
- Enter a custom field Key.17
- Enter a Description to indicate the purpose of the field displayed on the list of fields.
- Enter Help Text to provide guidance to users on how best to fill out that field.
- Check off whether or not the field should be Required On Artifact Creation.
- Assign a field to a Group.18
- Assign Write Permissions to allow granular access to editing this field gated by inventory record stakeholder types or user roles. Leave this field blank for default permissions where only the Customer Admin role has write access.19
When you are satisfied with the setup of your artifact field, click Save.
17 If left blank, a key will be automatically generated in camelCase format.
18 Ungrouped fields will be listed under No Group: Add artifact field groups
Rename artifact field keys
To rename the field keys for artifact fields:
Hover over the Actions column on the far-right for the field whose key you want to rename.
When the menu appears, click on it and select Rename Key.
Enter the New Key and click Check Availability.
If the key is not already in use, you’ll be presented with a list of dependencies to review.
Verify that these dependencies are correct and as expected.
Click Rename Key to apply your changes to the key.
Confirm that the dependencies updated are corrected and as expected.
Add artifact field groups
To group artifact fields, first create an artifact field group:
In the left sidebar, click Settings.
Under Artifacts, select Artifact Fields.
Click Add Group and enter a Name and a Description for the group.
Click Create Group to add the new group.
Assign the desired fields to the group.22
Delete artifact fields
Deleting an artifact field will remove it from all artifacts using that field, even if the field has been populated on an artifact.
In the left sidebar, click Settings.
Under Artifacts, select Artifact Fields.
Hover over the field you would like to delete.
When the menu appears under the Actions column, click on it and select Delete Field.
Click Yes, Delete Field to confirm permanent deletion.